 upfix.com
 888-979-9343
Introduction
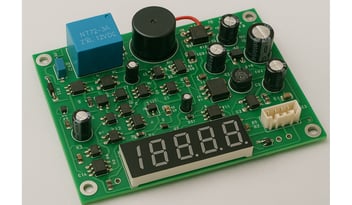
If your dishwasher won’t start, stops mid-cycle, or tosses random error codes, the root cause is often the control board—the “brain” that coordinates power, timing, relays, and sensors. Replacements can be pricey, hard to source, and sometimes require model-specific programming. At UpFix, we repair your original control board at the component level, so it goes back in plug-and-play—no coding mismatches, no risky “universal” substitutes, and no guessing. You keep your exact OEM board, we fix the underlying failures, and you get reliable cycles again.
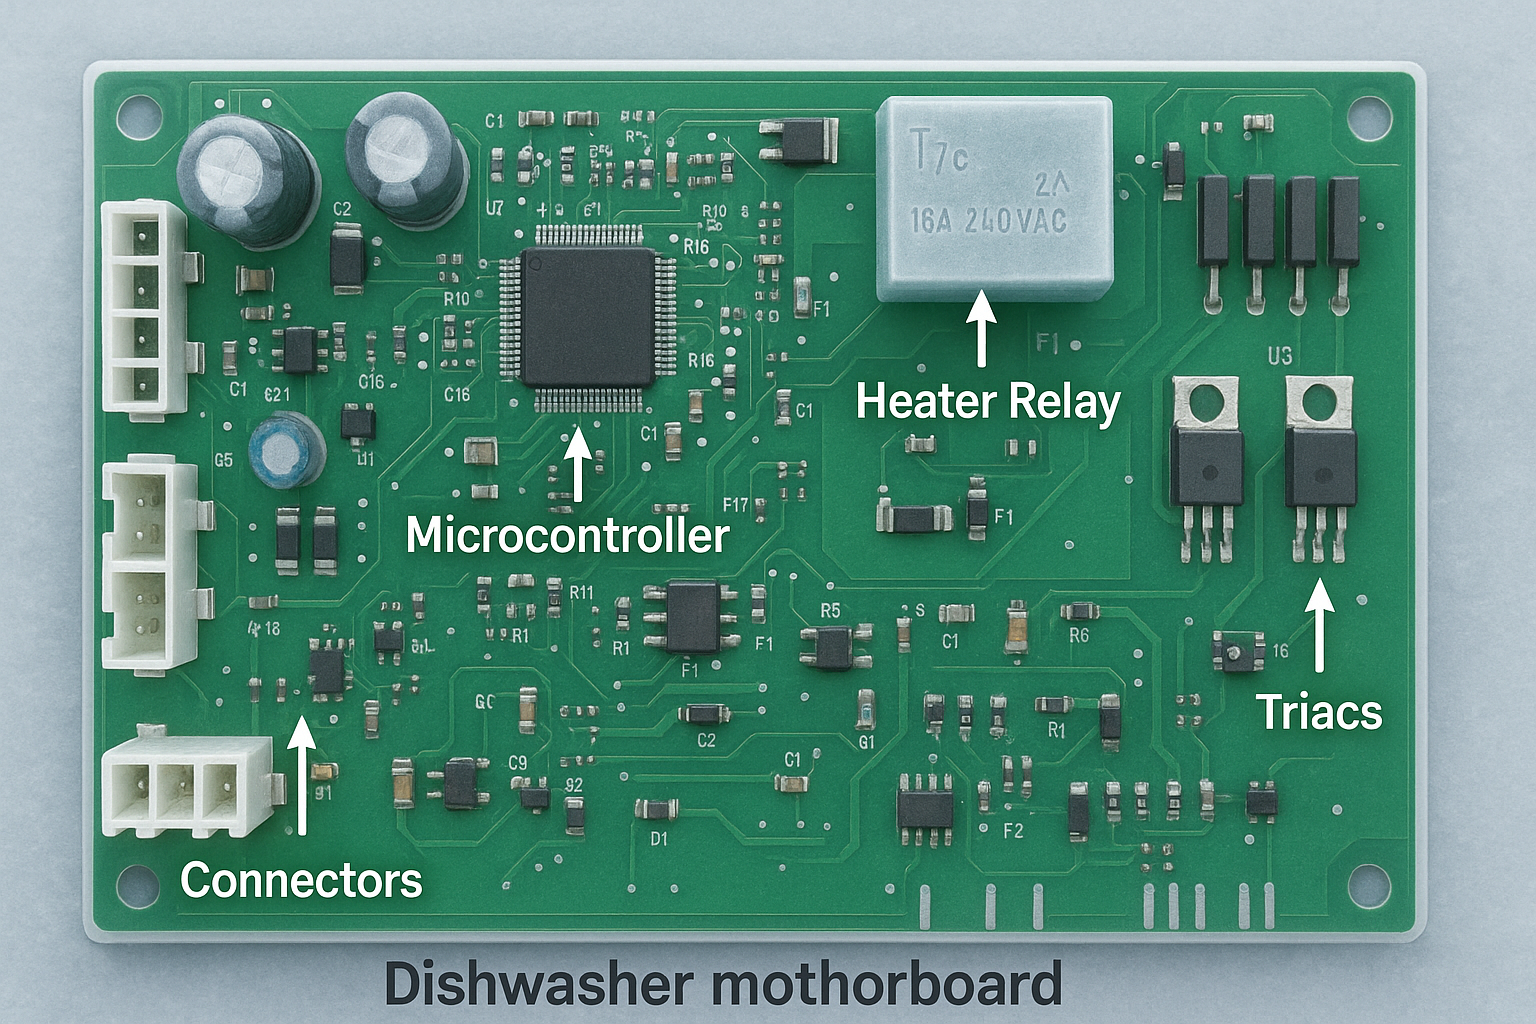
What a Control Board Actually Does (and Why It Fails)
Your control board manages:
-
Power distribution to pumps, valves, and heaters.
-
Timing & sequencing for fill, wash, drain, and dry phases.
-
User interface signals (buttons, LEDs, displays).
-
Safety interlocks (door latch, overheat protection).
Start Your Repair — Begin your control board repair with UpFix now.
Common failure points we see:
-
Shorted or stuck relays (heater or pump won’t engage).
-
Cracked/cold solder joints (intermittent power, random shutoffs).
-
Dried or bulging capacitors (low voltage, resets, display flicker).
-
Burned traces (localized overheating from high current events).
-
Moisture/corrosion (steam leaks, spills, condensation near connectors).
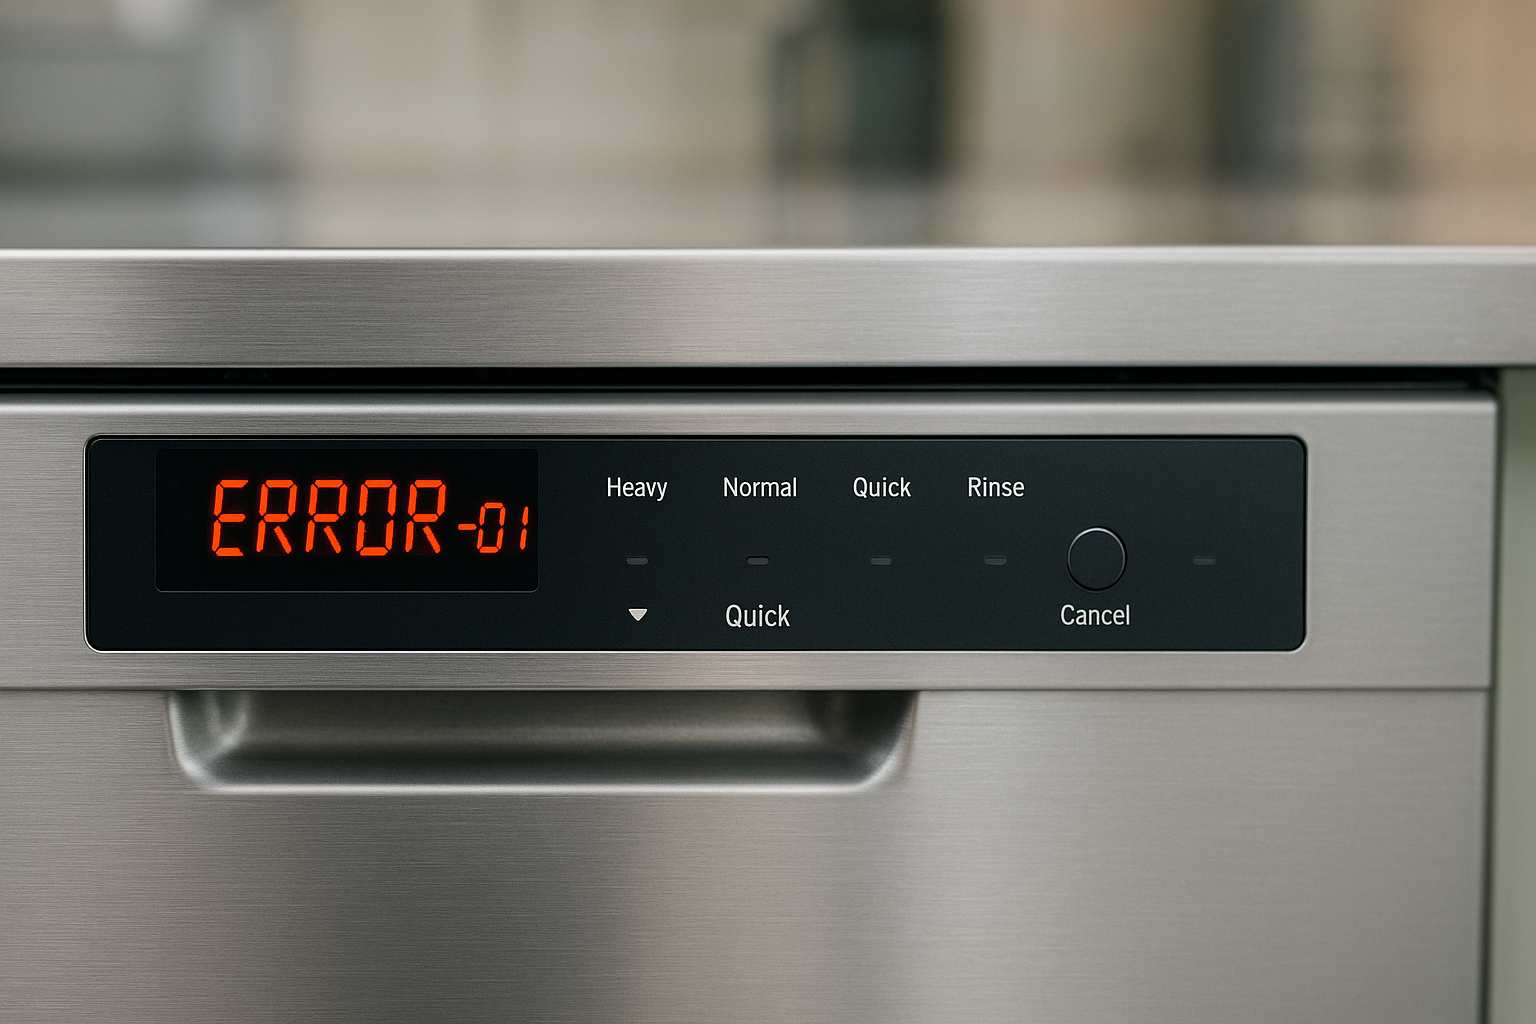
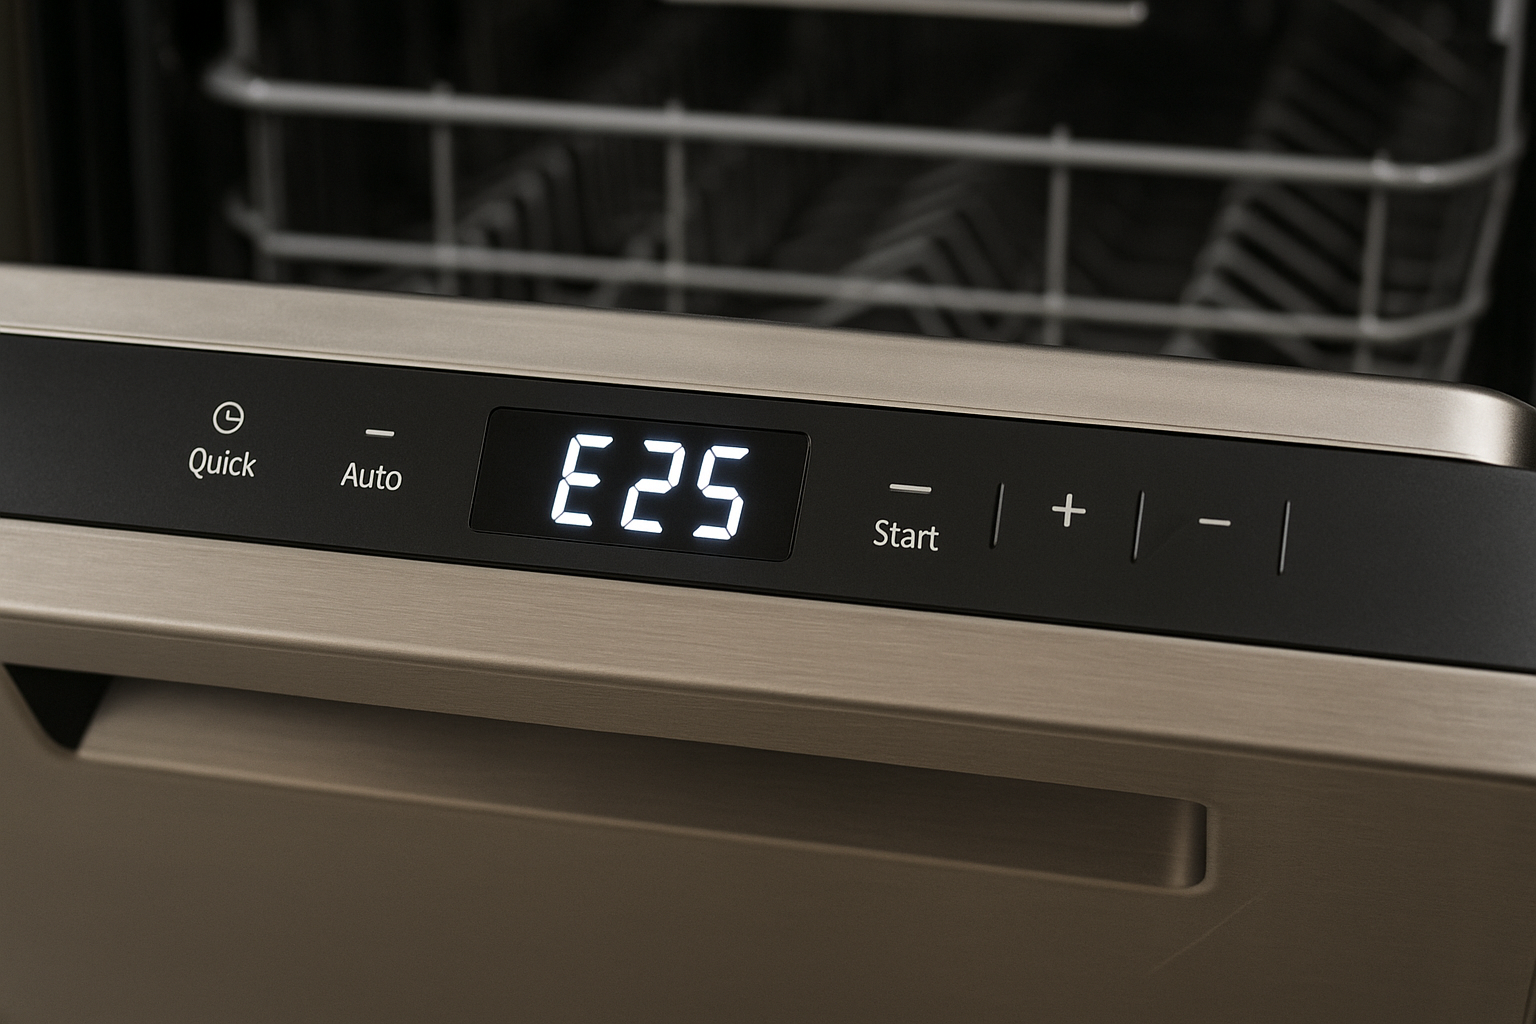
Symptoms That Point to the Control Board
-
Dead or unresponsive panel even with known good power.
-
Starts then quits—machine powers off or resets mid-cycle.
-
Nonsensical or rotating error codes that don’t match the actual issue.
-
No heat / no dry despite elements and wiring testing good.
-
Intermittent functionality—works one day, fails the next.
-
Burn smell, discoloration, or obvious board scorching.
If you’ve already checked breakers, water supply, and door latch, the control board is a prime suspect.
Chat with a Technician — Ask pre-ship questions and confirm symptoms.
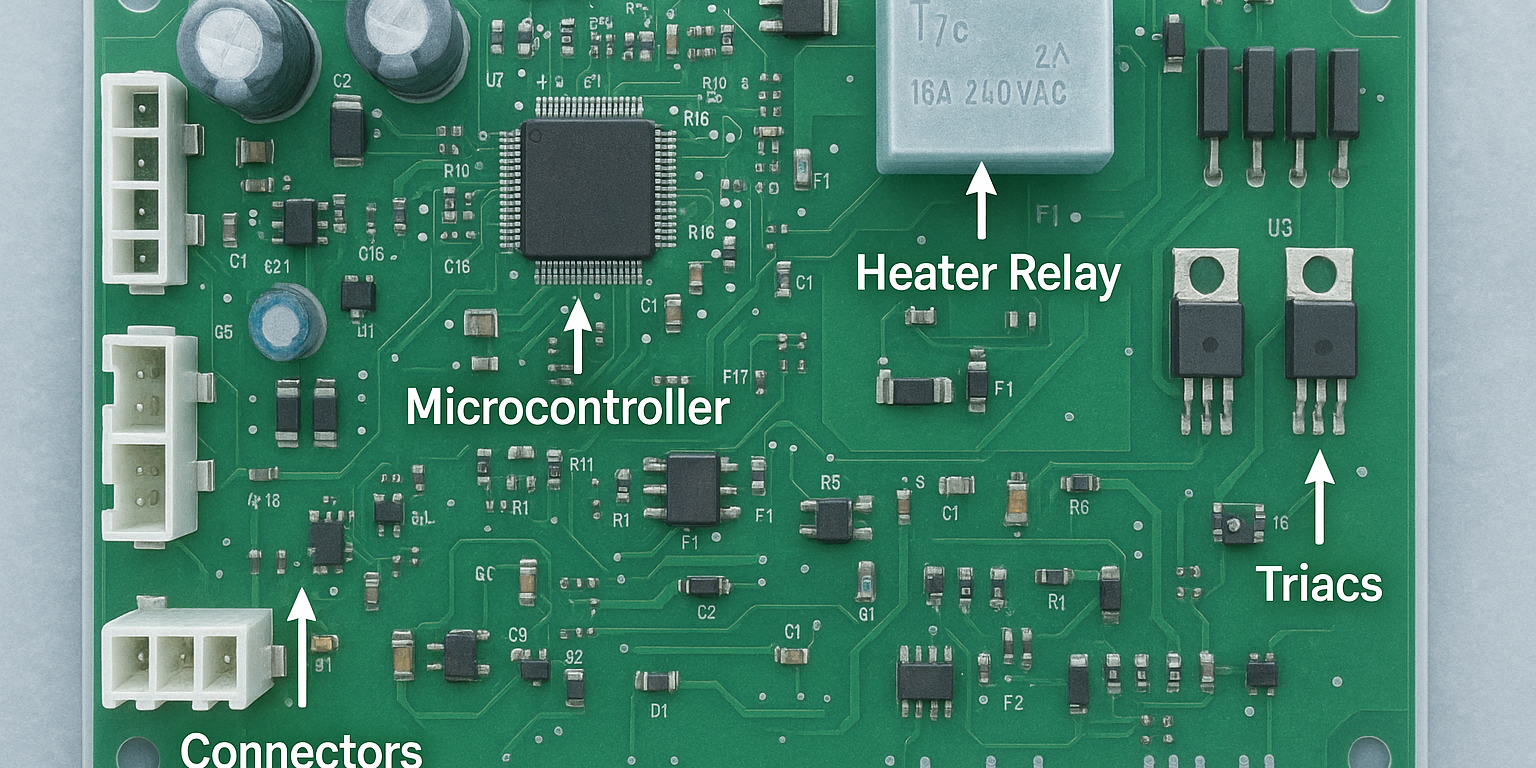
UpFix’s Repair Process (Built for Consistency & Reliability)
1) Intake & Bench Diagnostics
We power and probe the board outside the dishwasher, simulating key inputs (door closed, cycle start) and observing outputs (pump/heater/valve relays). We document any instability, dropouts, or reset behavior.
2) Root-Cause Analysis at the Component Level
We inspect for:
-
Faulty relays (pitting, welded contacts).
-
Power regulation issues (failed caps/regs).
-
Microcracks in solder joints under heat-stressed parts.
-
Damaged copper traces and oxidized connector pins.
-
Moisture paths that encourage intermittent shorts.
3) Precision Repairs
-
Relay replacement with quality, spec-matched components.
-
Voltage stability restoration (caps, regulators, rectifiers).
-
Solder rework on high-stress joints and header pins.
-
Trace rebuilds and protective conformal coating where appropriate.
-
Connector cleanup and reinforcement.
4) Functional Validation & Stress Testing
We re-simulate full cycle stages—fill, wash, drain, heat—and verify stable voltage rails. We check that UI inputs are consistently recognized and that outputs (relays) energize exactly when commanded.
5) Final QC & Return
We clean, pack, and ship your original board back, ready to install. No coding or “marriage” procedure needed because it’s your exact unit.
Case Study
Whirlpool Gold Series
Before: Unit wouldn’t start; panel lights flickered, faint burnt smell.
Fix: Replaced shorted heater relay; rebuilt a heat-stressed trace; refreshed power caps.
After: Stable power, full cycle completion, normal dry—no panel flicker.
Bosch SHE Series
Before: Runs for 5–10 minutes then resets; inconsistent error codes.
Fix: Identified low-voltage sag under load; replaced failing capacitors, reflowed cracked solder on power devices.
After: Completed full test cycles consistently; no repeat resets.
(Brands we commonly see: Bosch, Whirlpool, KitchenAid, GE, LG, Frigidaire, Maytag, Samsung, Kenmore, and more.)
Quick DIY Checks (Before You Ship)
-
Power Reset: Unplug or switch off the breaker for 5 minutes; restore power and retry.
-
Door Latch: Ensure the latch fully engages; a weak latch can mimic board failure.
-
Error Codes: Note any displayed/blinking codes; inconsistent rotating codes often point to a board issue.
-
Visual Inspection: If accessible, check the board for scorch marks, bulging caps, or oxidized pins.
-
Known Good Power: Confirm the outlet/breaker is solid (no shared GFCI nuisance trips).
If the dishwasher remains erratic or dead after these steps, the control board is likely at fault.
Troubleshooting Flow (Text-Based “Flowchart”)
-
No lights/no response
→ Verify outlet/breaker → Verify door latch → If power is good and latch OK → Control board power section suspect. -
Starts then dies / random resets
→ Check for moisture or steam leaks near the control area → If present, dry and inspect → Likely failing caps/solder joints on board. -
No heat / poor dry
→ Element & thermostat test OK? → Yes → Heater relay or board command failure. -
Buttons lag / misread
→ Ribbon cable seated and clean? → Yes → UI logic path or voltage stability on board.
When It’s Not the Control Board
-
Consistent single error tied to a specific sensor (float switch stuck, drain blockage).
-
Mechanical failures (broken pumps/valves) verified with direct power tests.
-
Door latch physically broken (will prevent cycle regardless of board condition).
If you’re unsure, send a short symptom list with your board; we’ll evaluate on the bench.
Why Repair Beats Replace (Especially for Control Boards)
-
Keep OEM coding & fitment: Your exact board, model-correct, plug-and-play.
-
Avoid “universal” pitfalls: Mismatched connectors, weird behavior, or lost features.
-
Fix the real failure: We address relays, caps, solder, and traces—not just swap and hope.
-
Cut waste and cost: Repair is greener and typically more affordable than buying new.
-
Confidence built-in: One-year warranty on repairs.
Shipping & Preparation Checklist
-
Send the board only (unless we ask for the whole console).
-
Protect connectors with soft wrap; cushion well to prevent flex/fracture.
-
Include details:
-
Make/model/approx. year
-
Clear symptoms (e.g., “dies at 10 mins,” “no heat,” “panel dead”)
-
Any error codes you saw
-
-
Add contact info (name, phone, email) in the box.
-
Optional photos of any scorch/corrosion areas can help us target failures faster (print or email).
FAQs
Do I need programming after repair?
No—because it’s your original board, it goes back in plug-and-play.
Can a control board cause tripped breakers or GFCI nuisance trips?
Yes. Shorted relays or damaged power circuitry can spike draw. Repairing the board typically resolves this—assuming downstream components are healthy.
My dishwasher shows different codes each time. Is that the board?
Often, yes. Inconsistent codes + random resets usually indicate unstable power regulation or logic faults on the board.
The heater tests good but there’s no dry. What next?
That’s classic relay/command failure on the board or a door not fully latching. If the latch is verified, the board is the likely culprit.
There’s corrosion on the board. Is it repairable?
Usually. We remove corrosion, rebuild compromised traces, and add protective coating. If damage is extreme, we’ll advise options.
How durable is the repair?
We replace failing parts with quality components and rework stressed joints. Boards that pass our stress tests typically deliver long service life
Brand-Specific Patterns We Often See (High Level)
-
Bosch / Thermador / Siemens: Low-voltage instabilities under heater load (aging capacitors), intermittent resets.
-
Whirlpool / KitchenAid / Maytag: Heater relay failures and browned traces in power sections; panel flicker.
-
GE: Oxidized headers and cracked solder at high-current points; occasional UI communication issues.
-
LG / Samsung: Moisture-related corrosion near connectors and ribbon interfaces; sporadic button response.
Care Tips to Prevent Future Board Stress
-
Fix minor leaks early—steam and drips near the console corrode boards.
-
Use recommended detergents—residue can attract moisture around seals.
-
Don’t slam the door—shock loads travel right into the control assembly.
-
Occasional high-temp cycle—helps reduce internal moisture and residue buildup.
-
Keep vents clear—improves dry performance and reduces trapped vapor near electronics.
Conclusion
A failing dishwasher control board doesn’t have to mean expensive replacements, long backorders, or guesswork with “universal” parts. By repairing your original board at the component level—relays, capacitors, solder joints, and traces—UpFix restores the reliability your kitchen depends on, preserves OEM fit and functionality, and gets you back to smooth, predictable cycles. Every board is bench-tested under simulated load and returned plug-and-play, for peace of mind.
If your dishwasher is dead, resets mid-cycle, throws random codes, or won’t heat, you’re likely looking at a board issue—and that’s exactly what we fix every day. Send in your unit with a short symptom list and let our specialists handle the rest
See Real Repairs — Follow UpFix on YouTube, Facebook, TikTok, and Instagram for before/afters