
 upfix.com
 888-979-9343
Car Won’t Start? Here’s How a Voltage Drop Test Can Save You Time and Money

Last updated:

How to Perform a Voltage Drop Test
Few things are more frustrating than turning the key and realizing your car won’t start. While it’s natural to suspect a dead battery, a faulty ECU, or even a blown fuse, there’s another common issue that often gets overlooked: excessive resistance in your wiring and grounding. Luckily, there’s a quick way to test for this before replacing costly parts — the voltage drop test. With nothing more than a multimeter, you can pinpoint whether poor connections or corroded wires are the reason your vehicle won’t fire
Need help fast? get diagnostic quote from UpFix.
What Is a Voltage Drop Test?
A voltage drop test measures how much voltage is “lost” as it flows through your car’s wiring and connections. In a healthy system, that loss is minimal. But if corrosion, loose connectors, or damaged cables create resistance, your starter won’t get the power it needs to turn over the engine.
In short, the test helps confirm whether the wiring itself — not the battery, ECU, or starter — is at fault when your vehicle fails to start
What You’ll Need
The good news is you don’t need expensive tools. A basic multimeter is all it takes to run this test.
-
Multimeter set to DC voltage mode
-
Vehicle in park or neutral with the parking brake engaged
-
Optional: A thermal camera for advanced diagnostics

Step 1: Prepare the Vehicle
To safely crank the engine without letting it fully start, you can remove the ECU fuse while leaving the starter fuse intact. This allows you to test the system under load conditions. Just be careful not to crank the starter for too long — a couple of seconds is fine, but extended cranking can damage the motor.
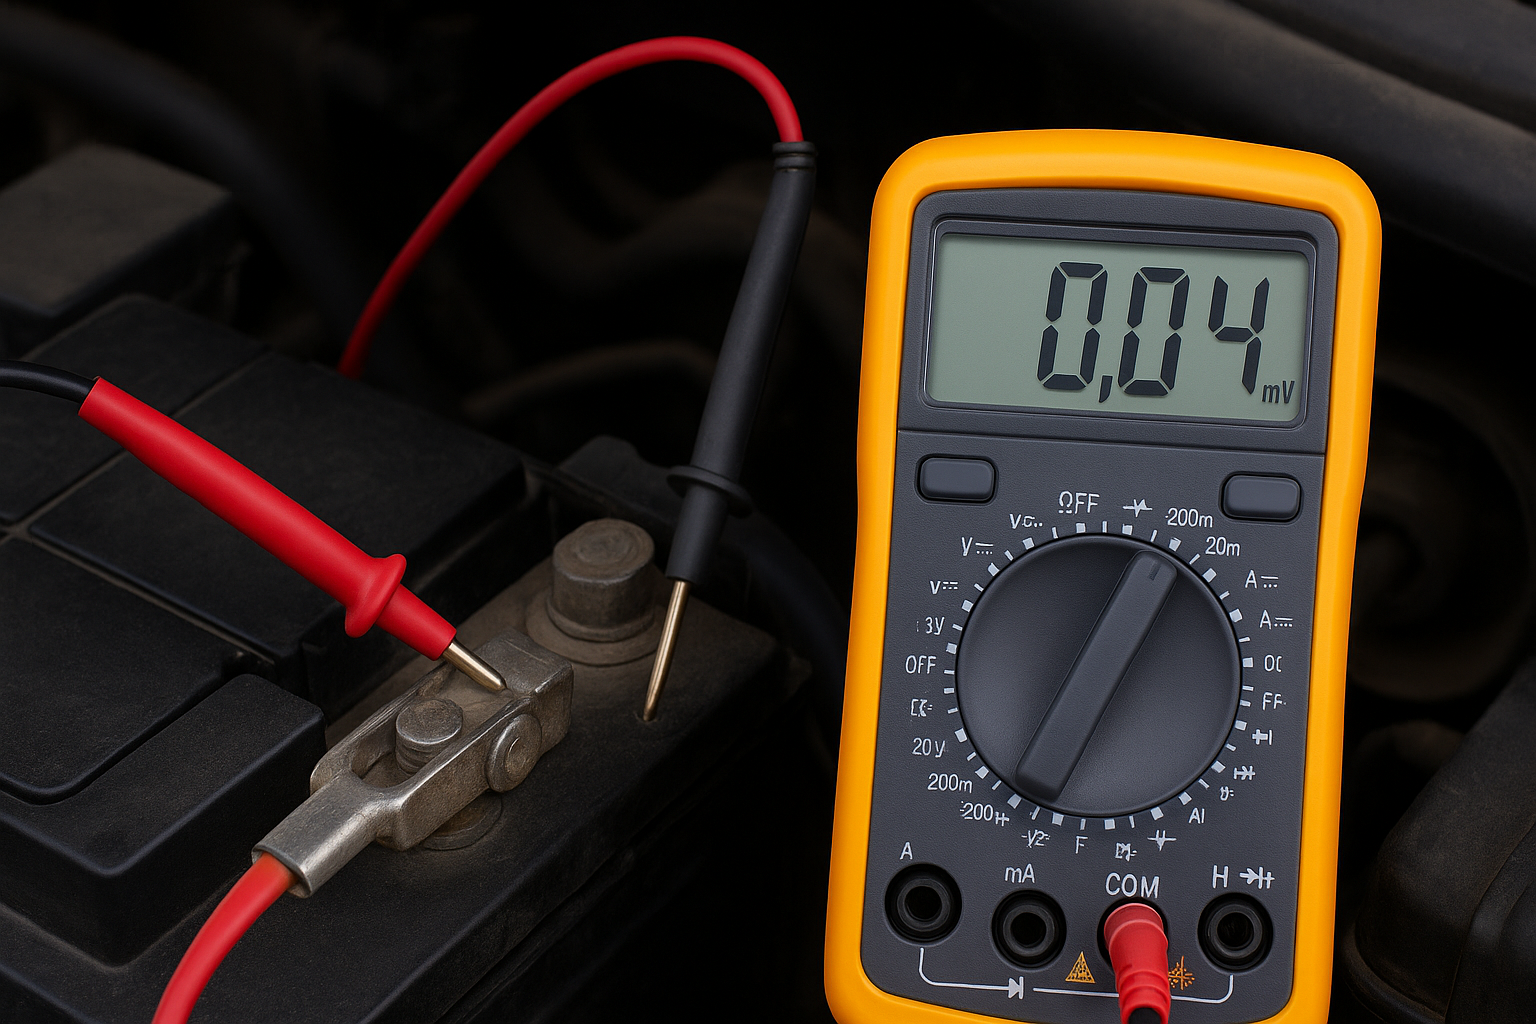
Step 2: Test the Positive Side
Place the red probe on the battery’s positive terminal and the black probe on a connector in the fuse box or wiring harness that connects to the battery. Briefly crank the engine and watch the multimeter.
-
Less than 0.2 volts (200 millivolts): Excellent
-
0.2–0.5 volts: Acceptable, but worth keeping an eye on
-
Above 0.5 volts: Indicates corrosion, a weak connection, or a damaged cable
Step 3: Test the Negative Side
Next, connect one probe to the battery’s negative terminal and the other to a chassis ground point, such as a bolt. Crank the engine briefly and note the reading.
-
Less than 0.2 volts: Normal and healthy
-
Above 0.5 volts: Likely a grounding issue that should be investigated
Step 4: Check Multiple Points
To narrow down the problem, probe different areas. For example, test the grounding washer or nut directly, then compare it to the cable itself. If one connection shows high resistance while another does not, you’ve likely found the trouble spot.
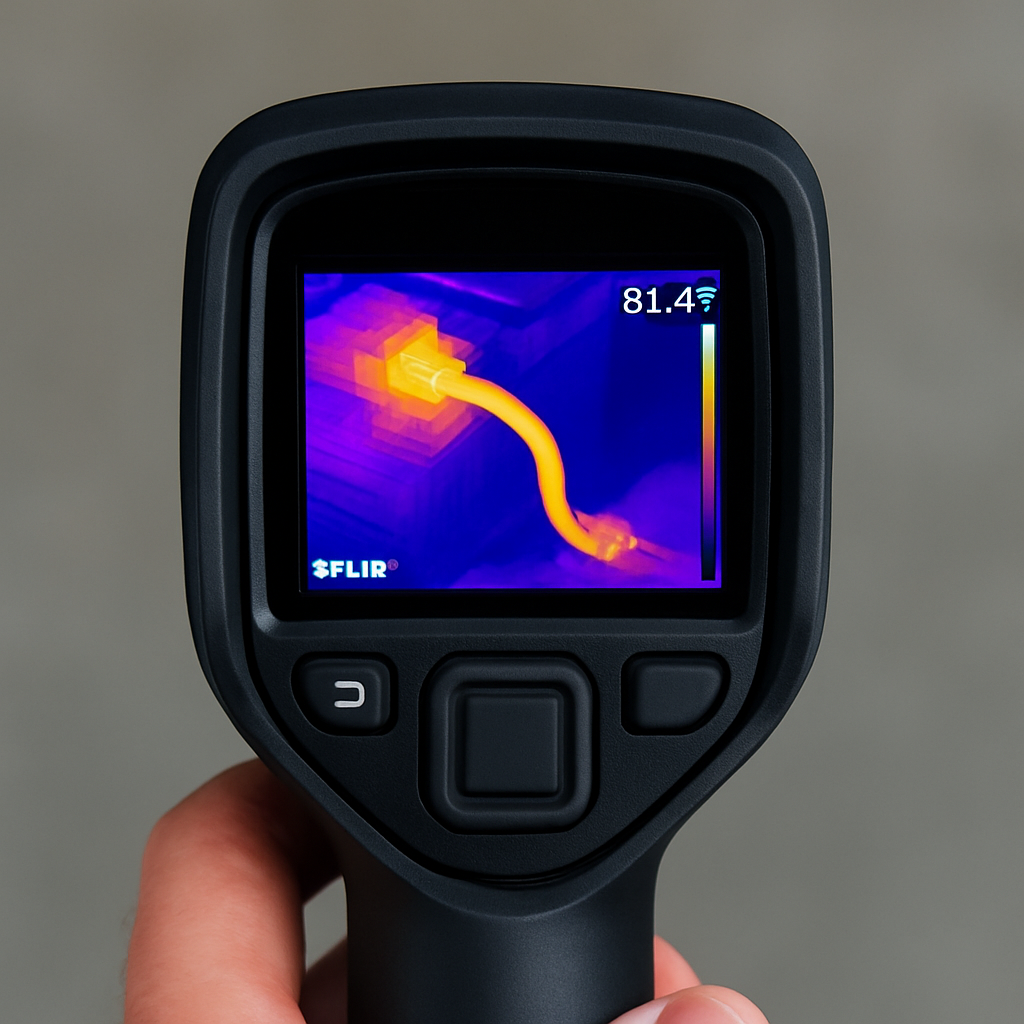
Advanced Option: Use a Thermal Camera
A thermal camera provides a visual way to detect resistance. Healthy cables stay cool, appearing purple or blue on the screen, while faulty ones heat up under load, shifting to orange or red. This method can quickly reveal hidden wiring issues that a multimeter alone may not show.
How to Read Your Results
Here’s a quick reference for interpreting your voltage drop readings:
-
Less than 0.2 volts: Excellent, connections are in good shape.
-
0.2–0.5 volts: Acceptable, but consider cleaning or tightening connections.
-
Above 0.5 volts: Problem detected — inspect for corrosion, loose connectors, or damaged wiring.
Case Study: Sedan refused to start
A customer came into our shop with a sedan that refused to start. The battery had already been replaced by another mechanic, but the issue persisted. The vehicle would crank but never fully turn over, leaving the owner frustrated and worried about costly ECU or starter replacements.
Reported Problem
The customer reported that their vehicle would crank but not start. They had already installed a new battery, but the issue persisted. The starter motor engaged, yet the engine would not fire up.
Diagnosis
To begin the inspection, our team performed a voltage drop test to check for hidden resistance in the wiring and grounding system. When testing the positive side, the reading came back at 0.12 volts, which is well within the acceptable range. However, when the negative side was tested from the battery terminal to the chassis ground, the reading spiked to 0.65 volts during cranking — far higher than the recommended limit of 0.5 volts. This immediately suggested a grounding issue. A closer look revealed corrosion on the main ground strap between the battery and chassis, which confirmed the suspicion. To verify, we used a thermal camera, and the ground strap quickly heated up during cranking, clearly indicating high
The Solution
The corroded ground strap was removed and thoroughly cleaned to restore a solid metal-to-metal connection. To ensure long-term reliability, the strap was replaced with a new heavy-duty ground cable. Once installed, another voltage drop test was performed. This time, the readings came back at 0.1 volts on both the positive and negative sides, well within the safe range. After the repair, the vehicle started immediately and ran without issue.
Experiencing similar symptoms? Start your repair order online.
Why Customers Rely on UpFix for Automotive Electrical Diagnostics
When a vehicle refuses to start, choosing the right repair partner can make the difference between a quick fix and costly, unnecessary replacements. At UpFix, customers trust us for accurate diagnostics, affordable repairs, and fast turnaround. Unlike general service shops that often swap parts until the problem goes away, we focus on pinpointing the exact cause of failure. Here’s why drivers continue to rely on us.
Specialized in Complex Faults
A no-start condition can stem from many possible issues — from a weak battery to ECU faults, bad relays, or corroded connections. Many repair shops default to replacing major parts like starters, alternators, or even entire wiring harnesses without narrowing down the true source.
At UpFix, we take a more precise approach. Using a voltage drop test, our technicians measure the actual resistance in the battery cables, starter circuits, and grounding points. This method allows us to identify whether the issue comes from excessive resistance in the wiring rather than a failed component. By isolating the exact fault — such as a corroded ground strap or loose connection — we fix only what’s needed. Even in challenging cases, we resolve problems efficiently at the component level.
Cost-Effective Restoration
We know how stressful and expensive vehicle repairs can become when unnecessary parts are replaced. Our process helps customers avoid wasteful spending by targeting only the faulty area.
Instead of replacing the ECU, starter, or entire electrical system, we restore what’s already there. For example, a customer recently came to us after replacing a battery but still facing a no-start issue. Other shops recommended a new starter or control unit. Our voltage drop test revealed that the real culprit was excessive resistance in the ground strap connection. By simply cleaning and replacing the strap, we restored the vehicle at a fraction of the replacement cost.
Our clients value this approach not only because it saves them money, but because it minimizes downtime and extends the lifespan of their vehicles. Every repair is also validated with a retest to ensure the fix holds up under real conditions.
Trusted Across Vehicles and Control Modules
While this case highlights automotive diagnostics, our expertise spans across multiple systems, including appliance control boards, fitness modules, and industrial electronics. The same level of precise, component-level diagnosis is applied to every repair we perform. Customers who come to us for car electrical repairs often return with their household or industrial modules — proof of the trust we’ve built across industries.
Expert Insights from UpFix Lead Technician
We believe that transparency and education help customers feel confident in the repair process. Ernest, one of our lead technicians, explains an important detail that often surprises vehicle owners:
“When performing a voltage drop test, the reading should be less than 0.2 volts on either side of the battery. If you see anything above 0.5 volts, that’s a clear sign of corrosion, a poor ground, or a bad connection somewhere in the circuit.”
This simple guideline gives drivers a clear benchmark to understand whether their wiring is healthy or compromised. By sharing these numbers and walking customers through the process, we not only solve the immediate problem but also empower them to recognize early warning signs in the future.
Safety Advice
Our technicians always stress the importance of caution when performing any electrical checks. Attempting repeated cranking without proper diagnosis can damage the starter motor. If your vehicle refuses to start and you notice repeated cranking with no ignition, stop before further damage occurs. Have a trained technician inspect the wiring and grounding system.
A preventative diagnostic test is far safer and far less expensive than replacing major electrical components unnecessarily.
Before diving into common questions, it’s important to understand why these answers matter. Many drivers face a no-start condition and aren’t sure whether the culprit is the battery, ECU, starter, or wiring. This section addresses the most frequent concerns we encounter from customers. Each answer below offers a direct explanation with expert-backed insights. Our goal is to help you feel confident about when to clean, replace, or reach out to UpFix for further support.
FAQs
Is a voltage drop test better than replacing parts one by one?
Yes. A voltage drop test isolates the problem instead of relying on guesswork. Many repair shops replace batteries, starters, or even ECU modules without confirming whether resistance in the wiring is the actual cause. By testing under load, we can measure exactly how much power is being lost across the circuit. This ensures the real issue—like a corroded ground strap or loose connection—is found before unnecessary parts are purchased.
What is a “normal” reading when performing a voltage drop test?
During cranking, a healthy circuit should show less than 0.2 volts of drop on either side of the battery. Readings above 0.5 volts are a red flag and almost always indicate excess resistance. Common causes include corrosion at the terminals, worn connectors, or a weak ground strap. These small points of resistance can keep a car from starting, even if the battery and starter are in good shape.
Can I safely perform a voltage drop test at home?
With a quality multimeter and some care, yes—but there are risks to be aware of. The starter should never be cranked for more than a few seconds at a time, or it can overheat. Multimeter probes must also make solid contact with clean metal surfaces, or the readings won’t be accurate. For most drivers, it’s safer to let trained technicians handle the test. At UpFix, we use calibrated equipment and follow strict procedures to protect both the vehicle and the starter system.
What does it mean if one side measures normally but the other side is high?
This typically indicates a weak link in the ground circuit. For example, if the positive side measures below 0.2 volts but the negative side spikes above 0.5 volts, the issue lies between the negative battery terminal and the chassis ground. Corroded or damaged ground straps are common culprits. Addressing this single connection often restores normal starting function without replacing major components.
Will a voltage drop test damage my vehicle?
Not if it’s done properly. The test itself is non-invasive and simply measures resistance under load. Problems arise only if the starter is cranked excessively or probes are placed incorrectly. That’s why experienced technicians stress short cranking cycles and careful probe placement. A properly performed voltage drop test provides valuable information without putting any additional strain on the vehicle.
What if my car still won’t start and the voltage drop test looks fine?
If both the positive and negative sides test below 0.2 volts, then resistance in the wiring is not the cause of the problem. At that point, the issue may lie with the battery’s health under load, the starter motor itself, ECU/fuse circuits, or even mechanical systems like fuel delivery or ignition. The key benefit of the voltage drop test is that it lets you rule out wiring resistance with certainty and move forward confidently with deeper diagnostics.
Still have questions about your no-start issue? Contact our support team for tailored advice.
Final Thoughts
A voltage drop test is one of the simplest and most effective ways to rule out wiring issues when your car won’t start. Before replacing batteries, starters, or ECUs, take a few minutes to run this test — it could save you money and prevent unnecessary repairs.
For a step-by-step demonstration, check out our YouTube tutorial below where we walk through the process in action.